A Few Circle B Kitchen Hacks
/Instead of posting a recipe this week, I thought I'd share a few of my favorite tricks, tips and kitchen shortcuts. I mean, besides recipes and ingredients, cooking is also about tools, techniques and efficiency, so I hope you find at least some of these sort of fun and helpful.
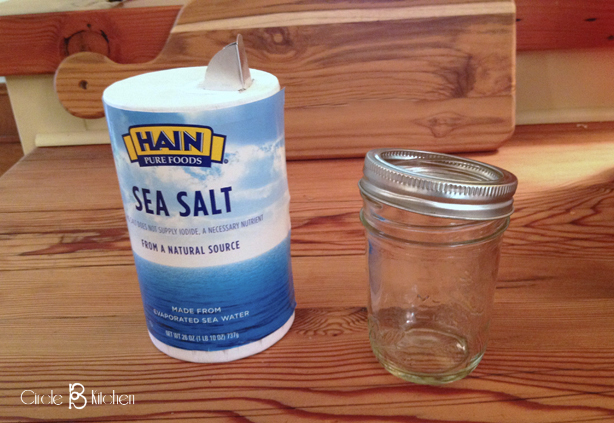
The first one is something I just found out about after the L.A. Times posted a blurb on Ball jar hacks. It's so simple and easy and really kinda brilliant.

So basically we're going to turn a Ball canning jar into a dispenser by cutting off the top of an empty salt box...
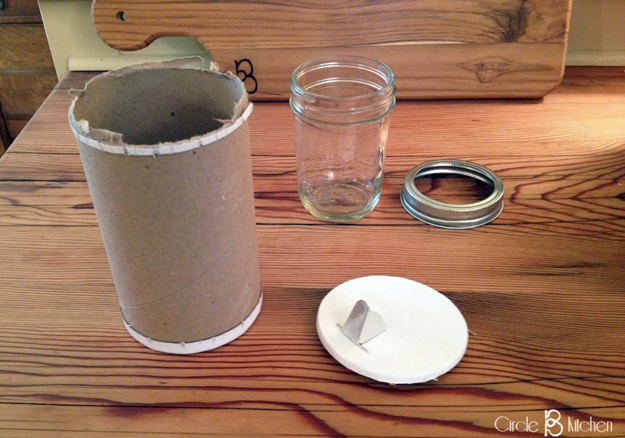
I used a bread knife to cut it off.
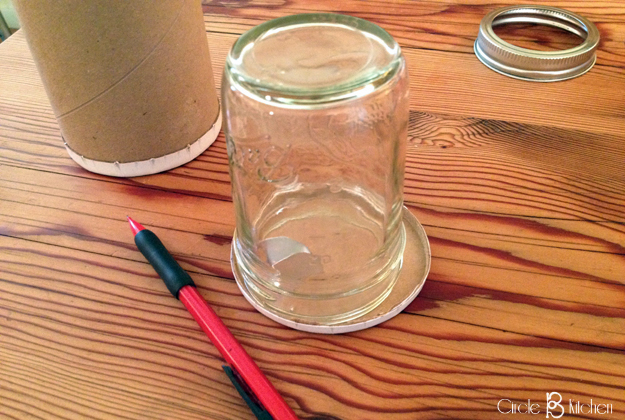
Trace the size of your jar on the back of the lid

And then cut it out and place it on top of your jar and then secure with the canning ring.

And voila! Fill it with salt, sugar, seasoning salt or anything else you might think of. Isn't that fun?
And if you use chipotle peppers in adobo very often, you know that it's sort of a pain to try and figure out how much of a pepper to use, fish it out, cut it up and then chop it up finely enough to work in your recipe.

I solved that problem by opening the can and dumping the whole thing in the blender.
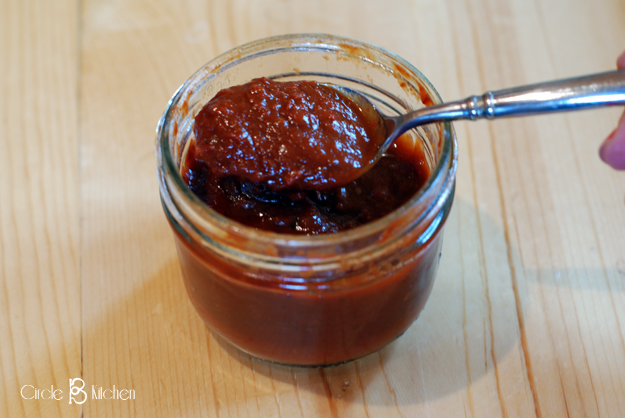

Just puree the whole shebang and then store it in an airtight jar, using as much or as little as you want. This stuff will last in your fridge for like 11 years.
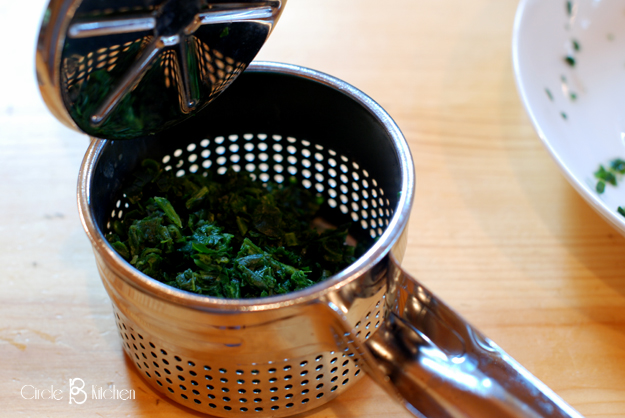
Another annoying chore in the kitchen for me is squeezing all of the liquid out of thawed spinach. Well, it was annoying until I discovered that my potato ricer makes quick work of this chore.
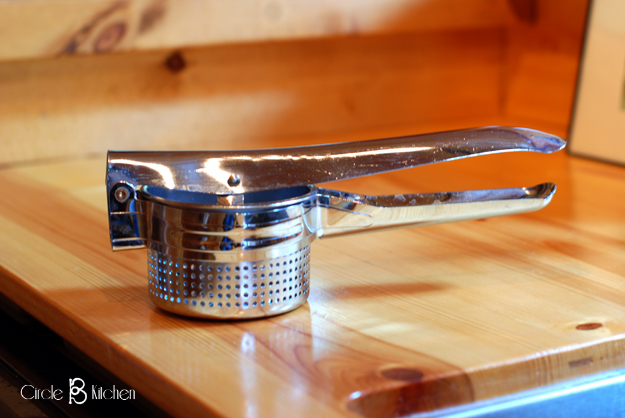

Just place your thawed spinach in the ricer cup, close it up and squeeze. In about 2 seconds you will have perfectly dry and useable spinach for whatever your heart desires.
So our next kitchen hack is actually a two-fer. First, let's talk about roasting peppers. Whether you're roasting poblanos or red peppers or any other pepper for that matter, we have always been told to roast the pepper whole (on the stove over a flame or in the oven), and then let it steam, loosen the blackened skin, open the pepper and clean out the seeds and membranes.
Is it just me or does anyone else out there find this tedious and quite aggravating? Well, my friends, I have come up with a couple of time-savers that have made me a very happy pepper roaster.
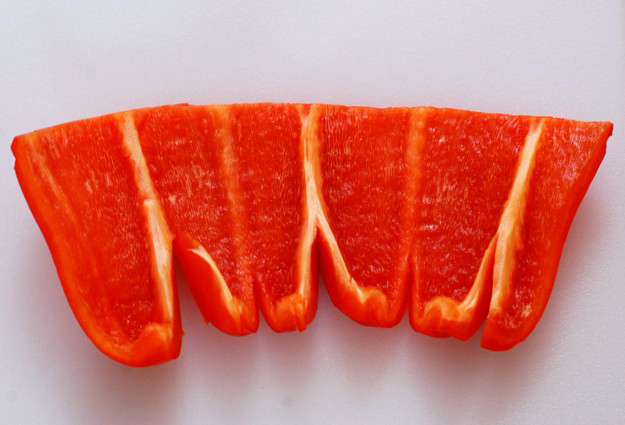
Firstly, let's not roast those peppers whole. I got the bright idea one day to cut the pepper open and clean it out BEFORE I roasted it and I swear it saved me like 10 minutes of annoyance.

So we're just going to cut off the top of the pepper, slice it open and remove the seeds and membranes. Which is SO easy BEFORE roasting!

Then just slice through the bottom a few times so the pepper will lay flat and then roast away. This works with red peppers too, of course...
Now we can talk about roasting them. I love the charred exterior and flavor that you get from roasting peppers over a flame, but trying to keep a pepper balanced over a gas burner is pain in the *&%! And it requires constant babysitting. But what if...
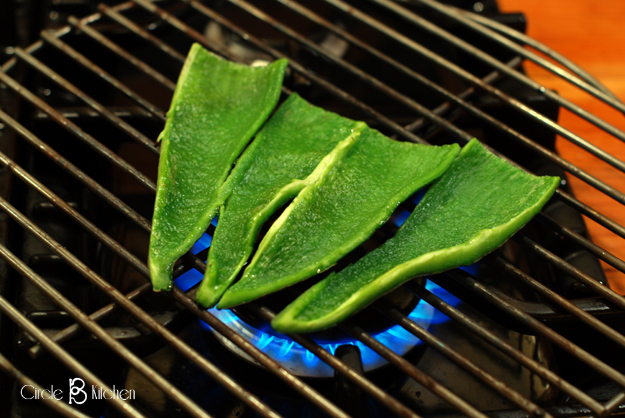
It may be hard to tell from this photo, but that is an actual BBQ grill sitting over my burner and it makes roasting peppers a breeze. About 20 years ago I was in the hardware store and I saw these really small replacement grills they had for tiny barbecues and the proverbial lightbulb went on over my head. And it's turned out to be just the greatest thing ever for roasting peppers on the stove, and other things which we will get to in a minute.
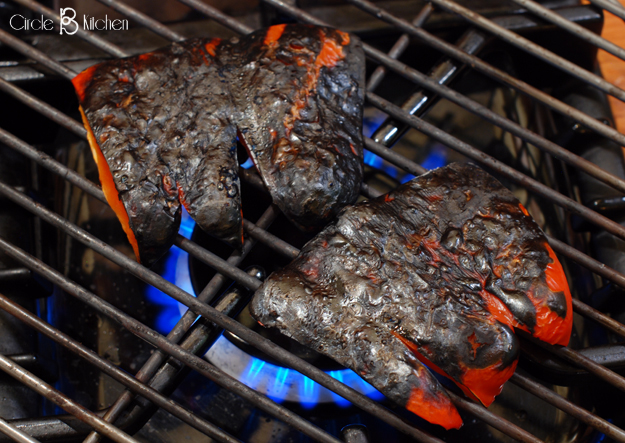
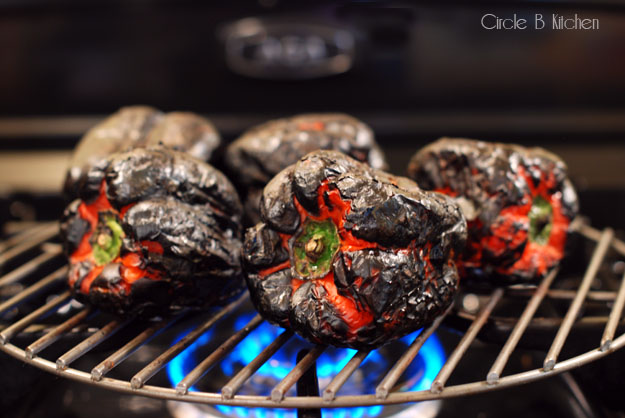
...and the cool thing is that you can roast several peppers at once. I took this photo before I figured out about de-seeding them before roasting, but you get the idea.

And now it's super easy to just pull off the blackened skin and use however I please, no muss, no fuss. BUT not only do I roast peppers on my little grill, I also heat up my tortillas on it!

which makes it super cinchy and gives them a lovely charred flavor as well.
Now, last, but certainly not least, is just a tip on reheating pizza. You probably already do this, but I thought I'd share it anyway cuz it works so great. We make a lot of pizza around here so it seems there are always slices of leftover pizza in the fridge. The microwave just destroys it, so here's the best way to heat it up and actually return it to its former glory...
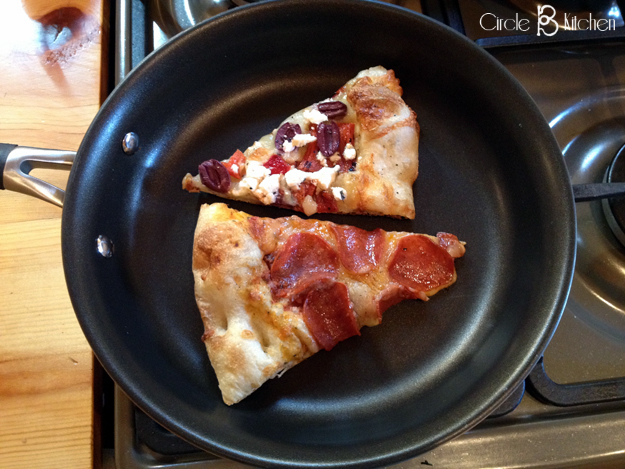
So basically, you just get your pan hot (about medium high heat) and add your pizza. Then put the lid on for about 3 to 5 minutes or until you can see the cheese getting melty.

Then take off the lid and let it continue to heat through and crisp up the bottom, another 5 minutes or so...
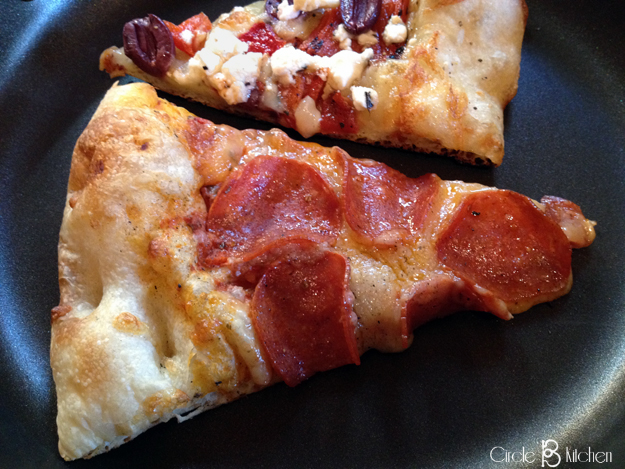
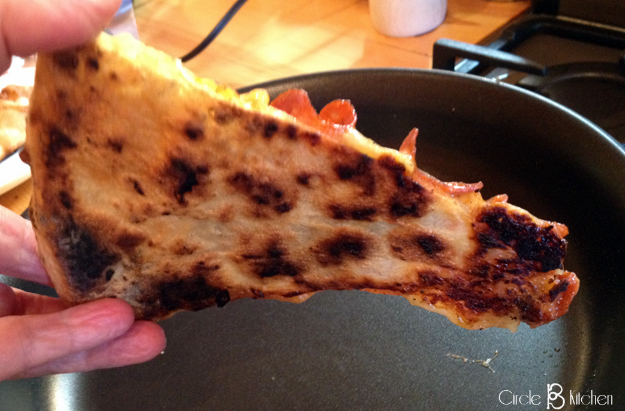
No soggy crust here. Just perfectly re-heated pizza. You're welcome.
Oh, and for those of you who cook with a lot of ground turkey, here's one more little tip. I happen to love ground beef, but The Husband prefers ground turkey for health and environmental reasons and I'm very much in support of both of those things, so ground turkey it is. But I do my very best when cooking with ground turkey to try and create the flavors and textures of ground beef wherever possible and this is my secret weapon...
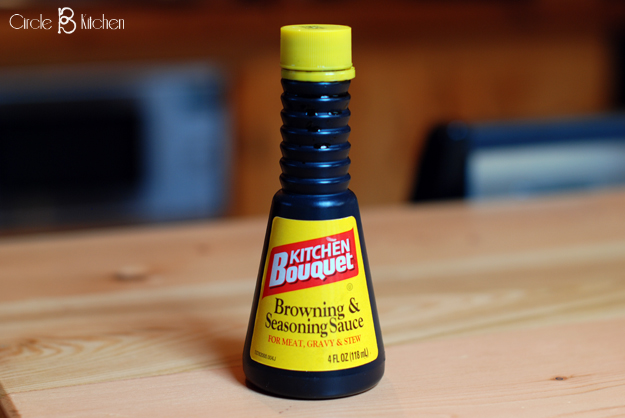
I've had this stuff in the kitchen since I first started cooking (about 40 years) because it's what our grandmas used to make turkey gravy dark and flavorful. But I got to thinking that if it was good for gravy (and it is), it might be good for meatloaf and meatballs and burgers, etc., etc. And I was ever so right. Firstly, I love that it takes away that anemic look that turkey meatballs and burgers can have. Secondly, I love the sort of beef-y flavor it imparts. It's like instant caramlization that gives ground turkey a much-need flavor boost. If you'd like to read about this stuff, here's a handy link for you..
htt ps://en.wikipedia.org/wiki/Kitchen_Bouquet
Alrighty then, people, I hope one or two of these kitchen hacks proves useful or at least amusing to you. Have a great weekend!!
XOXO
Patrice