Homemade Dinner Rolls
/
I love dinner rolls as much as the next person, but the thing is, there’s only so much I can eat at Thanksgiving, and choices must be made. So I usually forego the bread so I can load up on turkey, stuffing, potatoes, etc., etc., etc. Having said that, I’ve been trying out different dinner roll recipes and this one is, without a doubt, the best. This is how you want a dinner roll to be… just a little crusty on the outside, and very soft and yeasty on the inside. These rolls have a little heft to them, but are still light enough to eat several at one sitting. I know this from personal experience.
The good people at Cook’s Illustrated are to be commended for this recipe. As they do with so many of the recipes coming out of their test kitchens however, they tend to over think and over-complicate, so I have streamlined the recipe without any adverse effects. These rolls come out perfectly. Do not be put off by the lengthy instructions; these are easy to make. In spite of its length, each step of this recipe is easy, and each time I’ve made them, they’ve come out consistently and awesomely good.
I’ve already made a batch of these for our Thanksgiving dinner, and they’re waiting patiently in the freezer for their big day. I may just have to do without that second helping of mashed potatoes. I’m so having dinner rolls this year.
Homemade Dinner Rolls
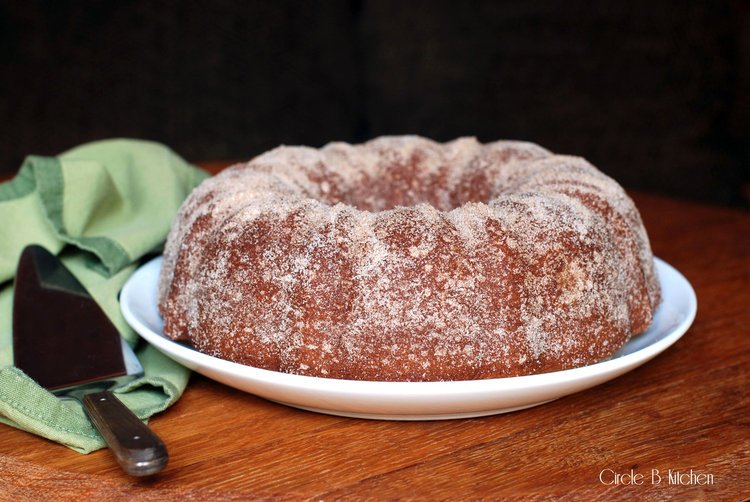
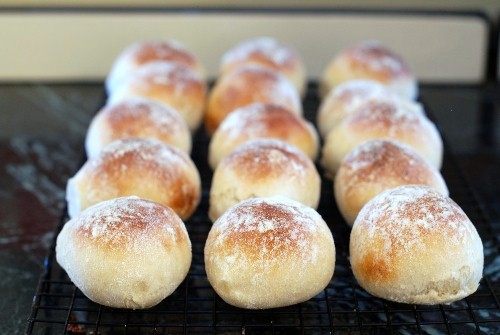
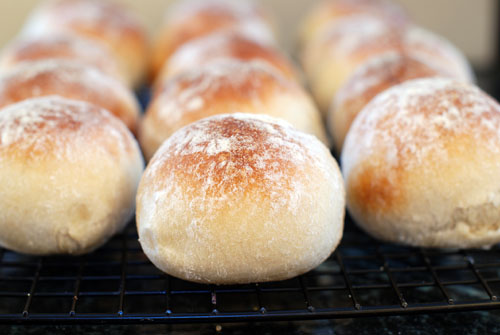
If you don't have a mixer with a dough attachment, just mix your ingredients in a large bowl and knead on a flour surface for 5 or 6 minutes until the dough comes together and is soft and satin-y. Then just proceed with the rest of the recipe. This method makes very rustic-looking rolls which are wonderfully light and fluffy. I roll each piece into a ball and pull along the counter to create surface tension and a pretty tight little ball. Place these in your baking pan and proceed with baking as noted. They will come out as shown in the photo. The surface tension creates a bit of a nice crust to each roll, while the inside is impossibly fluffy and delicious. If you would like to make these a day or two before your dinner, I bake them for the first 10 minutess at 500 degrees, remove them from the oven, let cool in the pans, cover with plastic and keep them at room temp until I'm ready to finish baking them for the final 12-12 minutes at 400.
Click here for a printable recipe
Makes 16 rolls
Adapted from Cook's Illustrated
1 1/2 cups plus 1 tablespoon water (12 1/2 ounces), room temperature
1 1/2 teaspoons instant or rapid-rise yeast
2 teaspoons honey
3 cups plus1 tablespoon bread flour (16 1/2 ounces), plus extra for forming rolls
3 tablespoons whole wheat flour (about 1 ounce)
1 1/2 teaspoons table salt
Instructions
1. Whisk water, yeast, and honey in bowl of stand mixer until well combined, making sure no honey sticks to bottom of bowl. Add flours and mix on low speed with dough hook until cohesive dough is formed, about 3 minutes. Cover bowl with plastic wrap and let sit at room temperature 30 minutes.
2. Remove plastic wrap and evenly sprinkle salt over dough. Knead on low speed (speed 2 on KitchenAid) 5 minutes. (If dough creeps up attachment, stop mixer and scrape down using well-floured hands or greased spatula.) Increase speed to medium and continue to knead until dough is smooth and slightly tacky, about 1 minute. If dough is very sticky, add 1 to 2 tablespoons flour and continue mixing 1 minute. Lightly spray 2-quart bowl with nonstick cooking spray; transfer dough to bowl and cover with plastic wrap. Let dough rise in warm, draft-free place until doubled in size, about 1 hour.
3. Fold dough over itself; rotate bowl quarter turn and fold again. Rotate bowl again and fold once more. Cover with plastic wrap and let rise 30 minutes. Repeat folding, replace plastic wrap, and let dough rise until doubled in volume, about 30 minutes. Spray two 9-inch round cake pans with nonstick cooking spray and set aside.
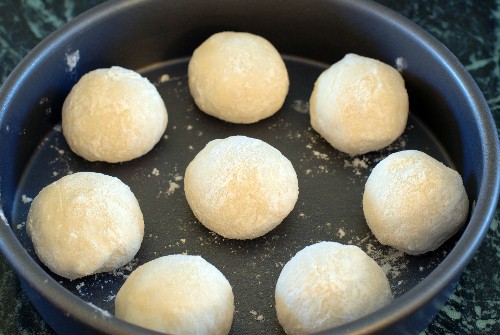
4. Transfer dough to floured work surface, sprinkle top with more flour. Using bench scraper, cut dough in half and gently stretch each half into 16-inch cylinders. Divide each cylinder into quarters, then each quarter into 2 pieces (you should have 16 pieces total), and dust top of each piece with more flour. With floured hands, gently pick up each piece and roll in palms to coat with flour, shaking off excess, and place in prepared cake pan. Arrange 8 dough pieces in each cake pan, placing one piece in middle and others around it, with long side of each piece running from center of pan to edge and making sure cut-side faces up. Loosely cover cake pans with plastic wrap and let rolls rise until doubled in size, about 30 minutes (dough is ready when it springs back slowly when pressed lightly with finger). Thirty minutes before baking, adjust rack to middle position and heat oven to 500 degrees.
5. Remove plastic wrap from cake pans, spray rolls lightly with water, and place in oven. Bake 10 minutes until tops of rolls are brown; remove from oven. Reduce oven temperature to 400 degrees; Continue to bake until rolls develop deep golden brown crust and sound hollow when tapped on bottom, 10 to 15 minutes. Transfer rolls to wire rack and cool to room temperature, about 1 hour.
Because this dough is sticky, keep your hands well floured when handling it. Use a spray bottle to mist the rolls with water. The rolls will keep for up to 2 days at room temperature stored in a zipper-lock bag. To re-crisp the crust, place the rolls in a 375-degree oven for about 10 minutes. The rolls will keep frozen for several months wrapped in foil and placed in a large zipper-lock bag. Thaw the rolls at room temperature and re-crisp using the instructions above.