Pizza!!
/
October is National Pizza Month! But every month is pizza month here at the Circle B Kitchen, and we’ll find any excuse to make it. I’ve been making pizza for about 30 years now, but it's still a work in progress. It seems I’m always tweaking this and fiddling with that.
When we were designing and building our place here, one of the things that was on the top of my wish list was a pizza oven, so our architect (who also happens to also be The Husband) designed it into the garden area right off the kitchen door. Then he went and built the whole thing with his own two hands, and a more beautiful pizza oven would be hard to find.

Of course, it took me some time to get the hang of starting the fires and keeping them going,

and how to get the hearth hot enough, or not too hot, how to use the coals, etc., etc., but after 8 years, I think I have it pretty well figured out, and when I don’t manage to screw it up, we can turn out some pretty tasty pizza.

Everyone has their own idea of what a good pizza is, and I think that’s as it should be. Pizza should be personal. You should have a relationship with your pizza, and you should get to have it exactly as you like.
Personally, I like to keep it simple. I prefer to make the crust the star and the toppings to be lovely adornments that complement but don’t detract.

The sauce should be light with a hint of tomato sweetness and the cheese should be, well, kinda melty.
I could go on for about 40 pages about pizza dough, but at the risk of leading you into mind-numbing boredom, I will be brief.
1. I prefer making my dough with bread flour. I’ve tried all-purpose flour and 00 Italian flour, but only the bread flour seems to give the dough the heft and lightly chewy texture we like.

2. I start my dough with a biga (flour, water, yeast and sugar), which I make early in the morning and let ferment until late morning or mid-day. Then I add the dough ingredients to the biga, which not only contributes flavor, but texture as well.

3. My dough is fairly wet (usually between 50 and 60% hydration) which makes it rather sticky to work with. I’ve learned how to handle it and it’s not hard, really, but a moist, sticky dough really gives a nice rise and great texture to your final pizza.

4. I let my dough rise a little longer than most recipes call for. The longer the yeast gets to hang out with the flour, the more flavor develops, so my dough usually rises for about 4 to 5 hours, with a “punch down” about half-way through. I’ve also been known to make the dough the night before and let it rise slowly in the refrigerator overnight.
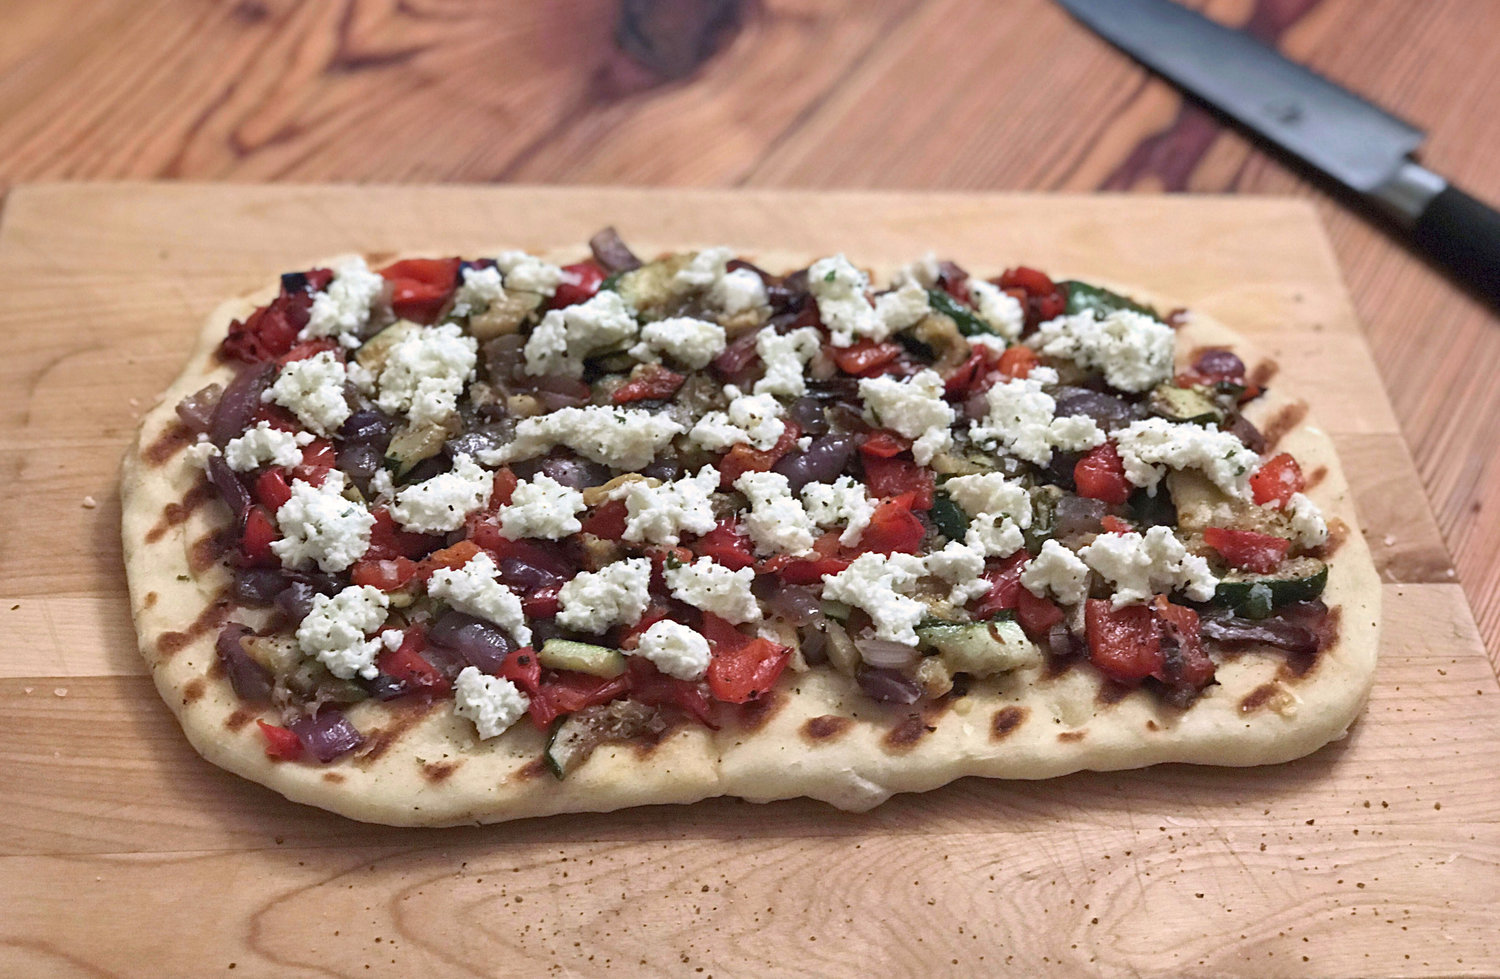
5. My pizzas turn out better if I stretch my dough thinner rather than thicker. The hearth in the pizza oven is usually between 600 and 700 degrees, so there is less chance of burning if the pizza cooks quickly.
6. You DO NOT need a pizza oven to make great pizza. When weather prohibits use of the outdoor oven, I can still get great pizza from my pizza stone indoors. I like to crank up the oven as high as it can go and let that stone preheat for at least 45 minutes before I cook.

7. If you have trouble getting your pizza to slide off your paddle and onto to your baking stone, just place a sheet of parchment paper on your paddle, assemble your pizza on the parchment and slide the whole shebang into the oven. After a couple of minutes you can pull the parchment out from under the pizza and re-use or discard it. This was a life-changing discovery for me!
Now if you’ve read this far, you are officially as pizza crazy as we are. We make no apologies for our obsession and neither should you.
Here's my recipe...
My Pizza Dough and Sauce
Click here for a printable recipe
Biga
2 1/4 tsp (or 1 pkg) active dry yeast
1 cup lukewarm water
1 tsp sugar
1 T flour
Dough
1 biga recipe
4 ½ cups (approx) flour
1 cup lukewarm water
3 T olive oil
1 T salt
Sauce
1 large can of whole tomatoes (preferable San Marzano)
2 tablespoons olive oil
3 tablespoons of chopped fresh basil or oregano
salt and pepper to taste
pinch of sugar, if necessary
Step One:In a large bowl combine all biga ingredients.Whisk well.Cover the bowl with plastic wrap and let it ferment several hours until you’re ready to start your dough.(I’ve let the biga sit anywhere from 1 hour to 6 hours.The longer the better, but it will still work if it only has a short ferment time.)
Step Two:To make the dough, sift 4 ½ cups of flour into the bowl with the biga mixture.Add 1 cup warm water, oil and salt.Mix well either by hand or mixer.Knead on medium high speed for 3 to 4 minutes. The dough should be sticky, so flour your hands.Remove and knead with both hands for 5 to 6 minutes.Add more water or flour by the teaspoon in order to have an elastic ball of dough.
Step Three:Place dough in an oiled bowl, cover and let rise for a couple of hours.
Step Four:“Punch” down the dough and fold it back into a ball, cover and let rise another couple of hours.
Place a pizza stone on the middle rack of your oven and preheat the oven to 500 degrees for 30 to 45 minutes.
Sprinkle a little flour on your countertop and with flour-covered hands, re-knead the dough and divide into 4 balls.For each pizza, stretch (or roll) the dough into a round that’s about 10” in diameter.Place a piece of parchment on your pizza paddle and then lay the pizza on top.Cut the excess parchment from around the dough and add your sauce and toppings.Slide the pizza onto the baking stone and cook until the dough is starting to brown and the sauce and cheese are bubbly (you can remove the parchment paper partway through the cooking).
For the sauce, place the tomatoes in a blender (or use a hand blender) to create a smooth sauce. Heat the olive oil in a 10" saute pan and add the tomatoes. Cook the tomatoes for about 3 to 5 minutes. Add the basil (or oregano), salt and pepper. Heat through and add a teaspoon or so of sugar, if needed. Let this simmer for another couple of minutes and then remove from the heat until ready to use.