Homemade Pita Bread
/
Now why, you may ask, would one spend an afternoon making pita bread when one can buy reliably good pita at just about any market these days? That's just what I was asking myself yesterday as I embarked on this project with no clear rationale other than it seemed like a good idea at the time. Truth be told, for me, making bread of any kind is perhaps what taking a nap is to normal people. So I guess the answer to that question is that it was either a shot of espresso or start baking. Right, then. Baking it is.


And why pita bread? Because firstly, it's fun. It really is very satisfying to get your hands into that soft, pillowy dough and make little balls and flatten them and then watch them puff to unnatural heights before deflating again into deliciously soft little flatbreads. And while it's an amusing way to spend a few hours, the real reason to make pita bread is because there's no packaged, store-bought version anywhere that can come even close to homemade for flavor and texture.

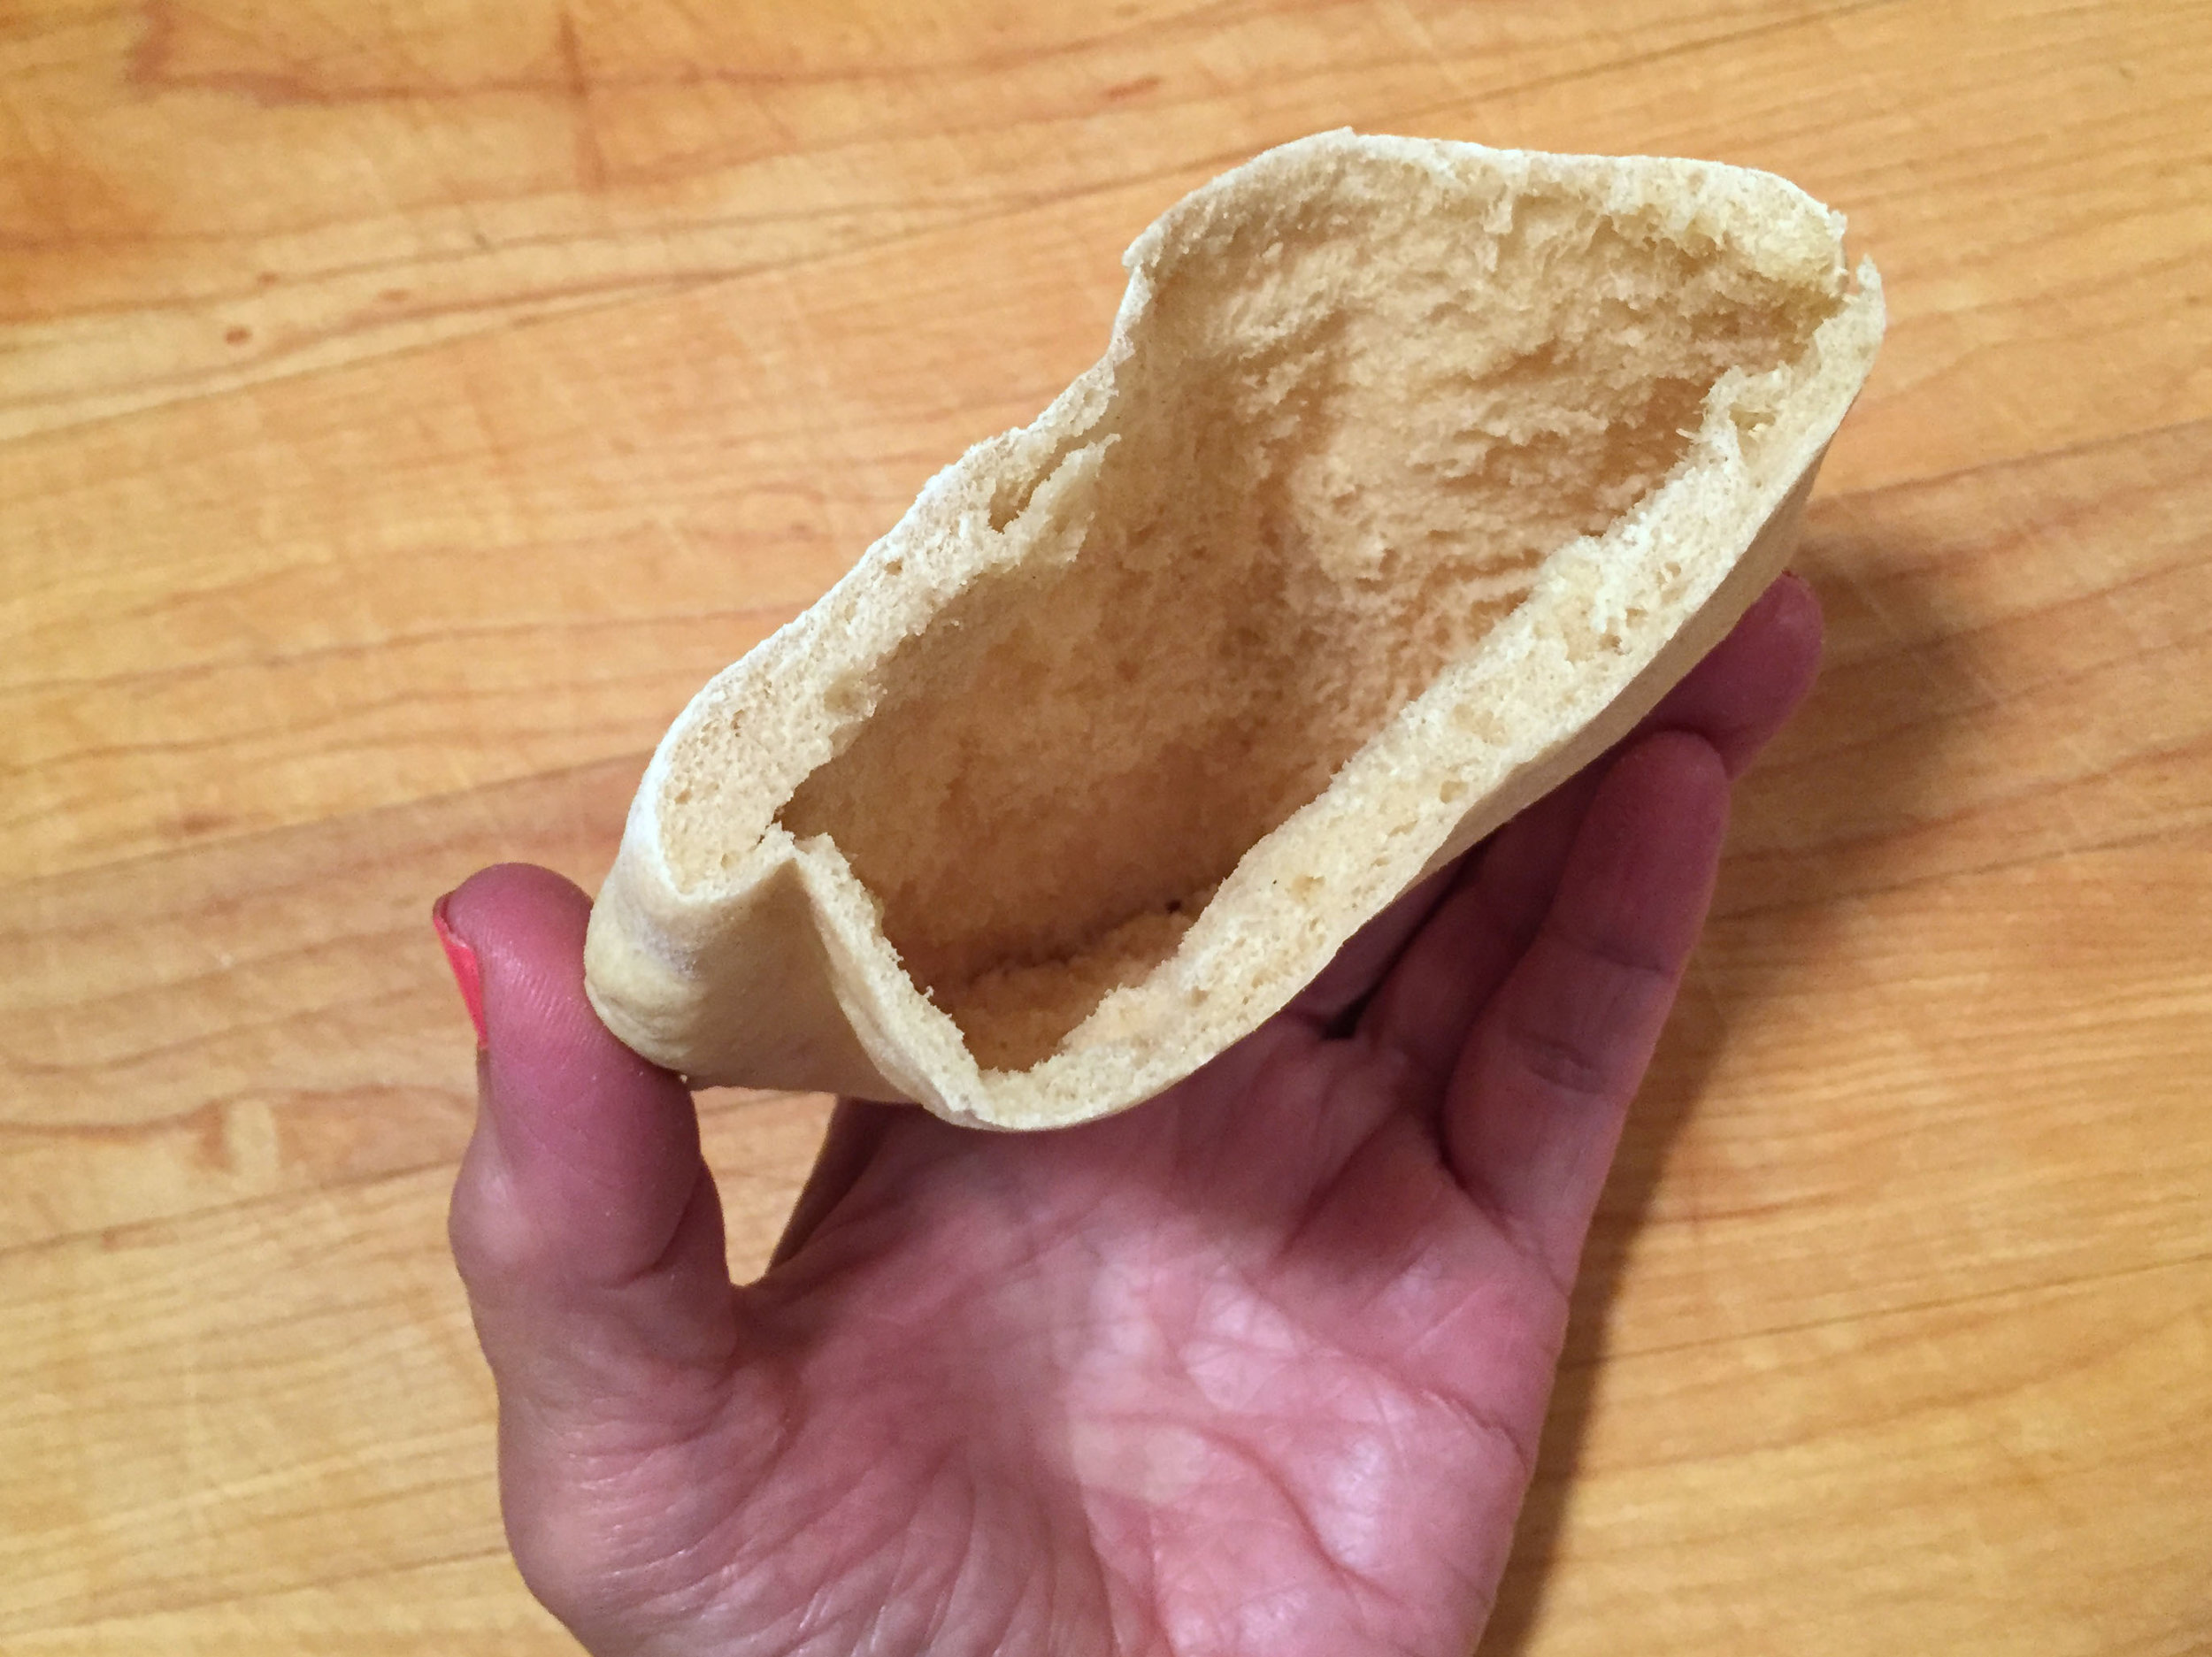
And I'm not even kidding about that. This recipe turns out a very soft, very flavorful pita with a big pocket just waiting to be stuffed if you so choose. The dough couldn't be simpler to make. We throw all of the ingredients into the bowl of a stand mixer, or you can easily mix by hand, knead (or let the machine knead for you), let it rise for an hour and then make little pita balls.


Those little balls get rolled into thin discs and then baked in a hot oven for 3 minutes,
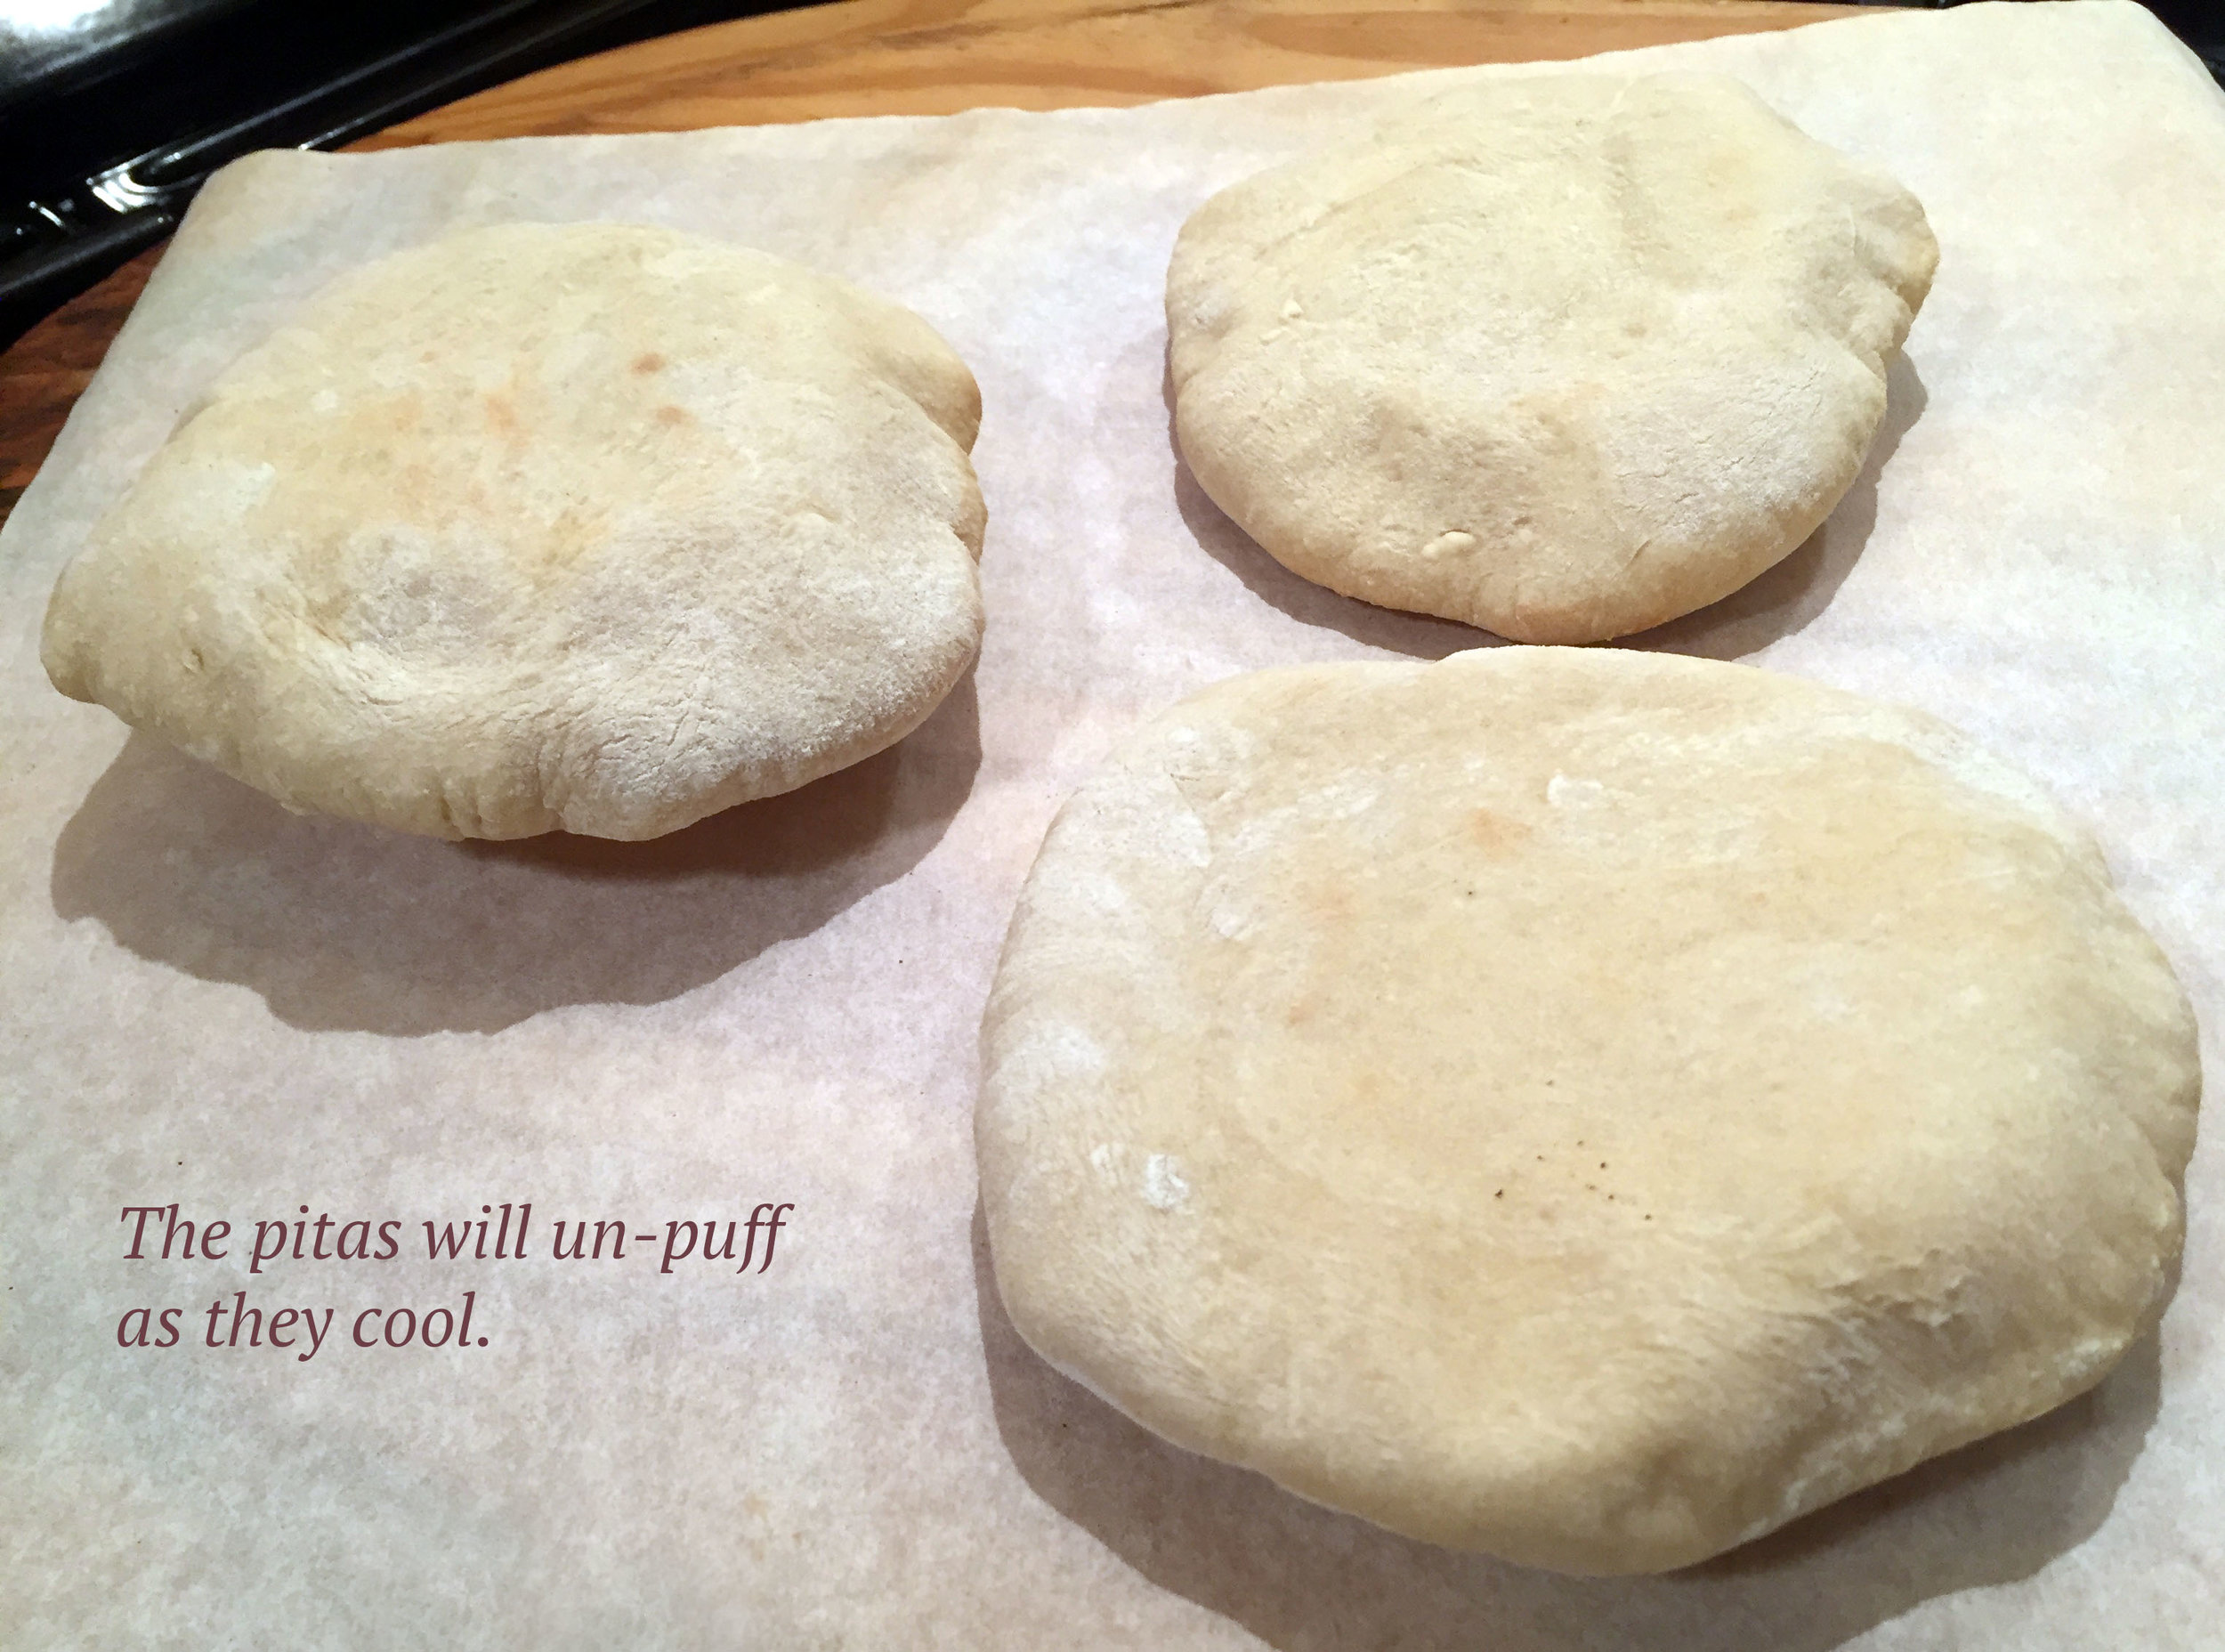

and once they're cooled, they're ready to eat. Or stuff.
Oh, and here's another reason to spend the afternoon making pita bread...

Pita chips!!! Oh my ever lovin goodness, these were the best pita chips in recent memory. I split the breads open and cut them in half so the chips would be thin-ish, drizzled them with a little olive oil and sprinkled them with sea salt and z'atar (a middle eastern spice mix).

It only takes a few minutes for them to crisp up, but the inside stays just a bit chewy. So good! Of course I served them with hummus. I would give you my hummus recipe, but I'm working on a new one and will publish that really soon.
So if you've got a couple of extra hours to kill, you could maybe make yourself some pita bread. Or take a nap. Your call. Here are the recipes...
Homemade Pita Bread
Click here for a printable recipe
The trick to turning out great pita bread is making sure that your dough is wet enough. It’s the steam created by the hot oven in the moist dough that causes them to puff and create that iconic pocket. I found that adding a couple more tablespoons of water to the Serious Eats recipe created the perfect dough. Do not worry about the dough being overly wet and sticky. You will be adding flour at every stage of the process. I keep my hands floured as well as the work surface, the dough and the rolling pin and it all works perfectly in the end!
Recipe adapted from Serious Eats
2 cups (10 ounces) all-purpose flour, plus extra for dusting
1/2 cup (2 1/2 ounces) whole wheat flour (I used white whole wheat flour*)
1 tablespoon granulated sugar
2 1/4 teaspoons instant yeast
1 teaspoon kosher salt
1 cup (8 ounces) water plus 2 more tablespoons
1 tablespoon extra-virgin olive oil, plus more for oiling the bowl
* White whole wheat flour is a whole grain flour made from white wheat. It is a whole grain wheat that is just lighter in color than red wheat, which makes it perfect in recipes where you want the nutty goodness of whole wheat but with a milder flavor.)
Directions
In the bowl of a stand mixer (or large bowl if mixing by hand), add the flours, yeast, salt and sugar. Use a whisk to mix well and then with the mixer on low and using the dough hook, add the water and olive oil. Once the dough comes together, knead for 8 minutes, or if kneading by hand, 10 minutes. The dough should be fairly tacky, bordering on sticky, but not overly so. :)
Turn the dough out onto a lightly floured work surface and form into a smooth ball. Lightly oil a clean mixing bowl and place the dough inside, then rub oiled hands over the top of the dough. Cover bowl with a damp cloth and let rise for 1 hour.
Meanwhile, place a baking stone, cast iron griddle or cast iron pan in the oven and preheat oven to 500°F. Line a plate with a large, clean kitchen towel and set aside.
Punch down the dough, transfer to a lightly floured work surface, and cut into 8 even pieces. Form each dough piece into an even ball and let rest, covered, for about 10 minutes.
Roll each piece of dough into a very thin 6-7-inch circle and place on parchment paper. Use a pizza paddle or large spatula to slide the discs onto the stone or cast iron pan (the parchment paper makes transfer easy and doesn't burn). I could get 3 discs onto each piece of parchment and then onto my pizza steel in the oven.
Bake for 2 minutes. The pitas will have completely puffed in that time. Flip them over and continue to cook for 1 more minute.
Remove from the oven and place on the towel-lined plate. Cover them with the towel while you finish finish baking the remaining pitas. And then they're ready to eat!
If not using immediately, cool completely and then store them in ziploc bags for several days.
Homemade Pita Chips
Click here for a printable recipe
Makes 24 or 32 chips
4 pita breads
olive oil
sea salt
z'atar seasoning (optional)
Preheat the oven to 375 degrees. Cut the pita breads in half, open the pocket to make slicing in half again easy. For each pita bread you should have 2 thin disks. Cut each disk into 6ths (or 8ths if they're large enough), depending on how big you would like your chips.
Spray a baking sheet with nonstick cooking spray and then place your pita pieces onto the pan. Drizzle with olive oil or spray with olive oil cooking spray. Sprinkle with sea salt and if you have some, sprinkle them with z'atar.
Bake for 10 minutes, but start checking around 7 minutes and remove any chips that are browning quickly. Continue to bake, until all of the chips are lightly golden and crisp. Baking times will vary, depending on your particular oven and the thickness of your chips.
Serve with hummus or the dip of your choosing.
Store in an airtight bagThese chips will stay crispy